Time for another Technique Training, class is in session!
One of the hallmark features of game-guru is the terrain system, which is basically the main difference between the old FPS Creator X9/10 and Game Guru (or FPS Creator Reloaded, if you remember it back that far). This system, however, initially feels very bland. With a little work though, you too can get pretty excellent looking terrain if you have an idea of how to use the tools available!
The first thing we're going to need is some inspiration. As always, I start in the usual place - google image search.
It's really that simple, honest.
Today, I've selected this picture as my inspiration. Please note, it's not designed to be a direct copy, but rather just something to give me ideas and a general feel for how I want my terrain to look.
So what we're going to do to start is load up a new, flat level and make the terrain sculpting tool the largest size possible (With the + key). Once it's the largest size possible, you're going to simply pick a point and make a mountain, right?
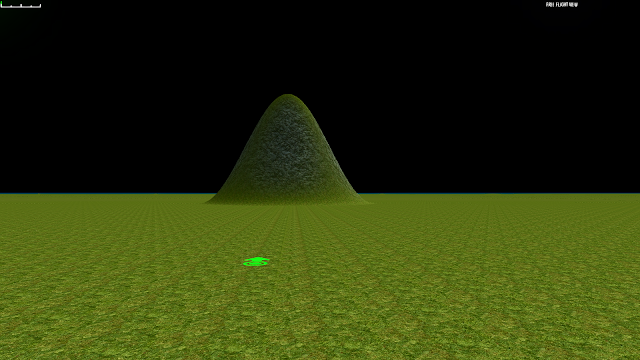 |
| We're all done, right? |
So you've made your giant lump. Congratulations! You've now officially joined the ranks of 'first time Game-Guru' user! Obviously, this is wholly insufficient for what we need. We are looking for a broad, jagged mountain range. So at this point the next step is to offset your position a little bit and 'build up' some larger hills to the side and front of it. I generally will try to add a light slope to the front as well because most mountains have this feature.
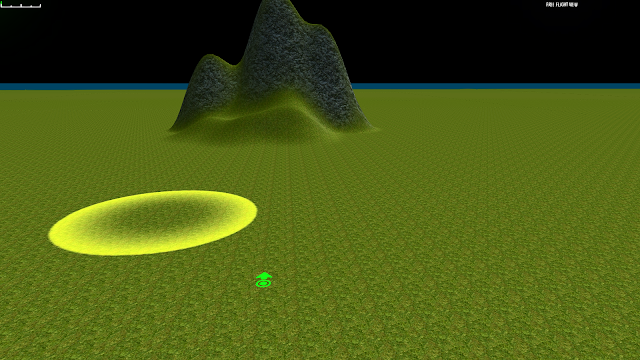 |
| It's a little better, more 'mountainy', for sure. Miles to go though. |
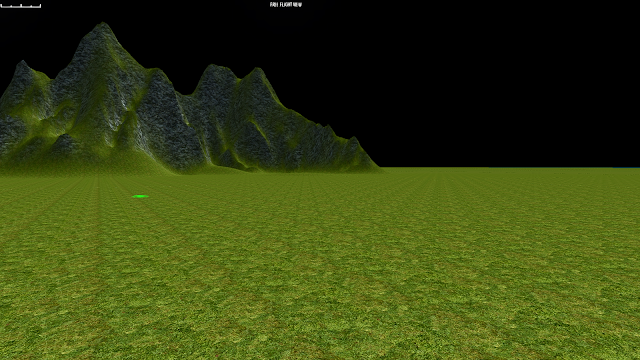
Now a big part of making mountains in GG look decent is adding depth to them; this is done not by adding tons and tons of hills but rather using a physical parallax effect. What's parallax, you ask? Parallax, simply put, is a layering method to produce a more depthful effect when looking at a flat image. In the past (and even in today's modern indy games/side scrollers/etc) it was used to produce a look that provides a faux three dimensional effect. In this case, we're going to be basically placing one mountain range BEHIND another.
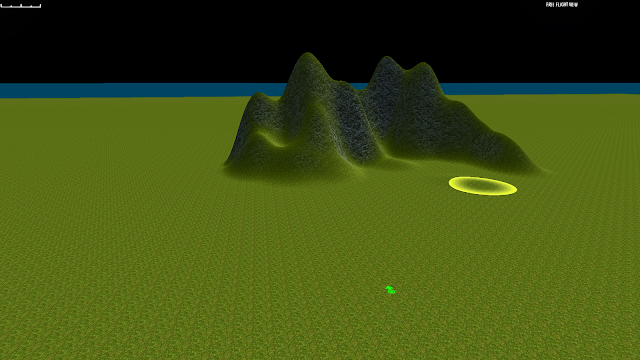
In the case of game guru, we're going to create a parallax style background by using physical elements. The layering of mountain ranges will provide a *REAL* tangible feel to them, which is part of why I chose the original picture. If you notice, said picture has two basic seams of mountains running next to each other. That's what we're going to achieve here.
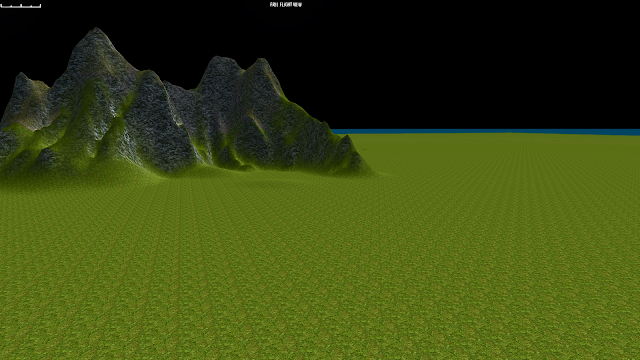
 |
| Note, this second mountain range is the one on the right, offset about one max size half circle width. |
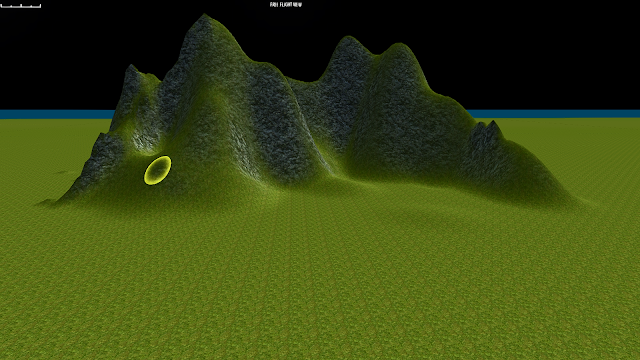
At this point you've got the basic terrain features. And boy do I mean basic. You have a few lumps and some rounded components which show the barest approximation of that beautiful vista I chose earlier. Don't worry, we'll tighten it up. The next thing you're going to want to do is make the circle about half of maximum size and start drawing lines to connect the ranges and taper off.
 |
| Still looking very much like a mashed potato mountain, but getting closer. |
At this point you're thinking "Yeah, yeah... This is the easy stuff. ANYONE can do this. These mountains are neither good nor convincing!". And you'd not be wrong. Except this is just the barest piece. The next part is the crucial part, the part that really shapes this into a realistic mountain. You want to take your brush size down to the smallest size possible. What you're going to do now is starting at the top of the mountain and steadily drawing lines down to the bottom. This is to represent the hard edges you find on any mountain (aside from dome types, that is). Continue drawing lines down the side, breaking lines of into separate branches. Make sure you don't spend too long in one place or you will have a very ugly spire sticking up.
 |
| Remember to start at the top! |
Continue tracing down the mountain, and going over each major ridge to give it a hard rocky look. It doesn't take much experience to do this. You can pick up the technique pretty fast.
 |
| When you overdo a section, like I did on the right, plan on doing a little extra to make it look natural. |
After about 20 or 30 minutes of fine shaping you'll have a much more realistic rock face with hard ridges, faults, etc. It's real important to try to capture the
shape of the type of mountain you are working with.
 |
| Definitely looking more mountainous now! |
So you can see that it's looking more like a mountain but there's still a lot of overly sharp edges which don't quite look right. Even the most harsh mountain range still has SOME degree of erosion to it. So after you get this much of your shaping done, adjust your tool to be about half of maximum size again. Click on the blend mode tool and start doing 'taps' over the harder terrain to soften it up. It's important not to overdo the blend tool so just highlight an area and click once, twice, or however much is needed until you get the desired shape. This will make the mountains seem far more natural. You also can use the shift key to create indents or create channels (as opposed to ridges). You can also do single shift-clicks to create minor pockmarks that are far more realistic than a single click to raise terrain.
 |
| It's subtle, but you can see the difference the most on the right. |
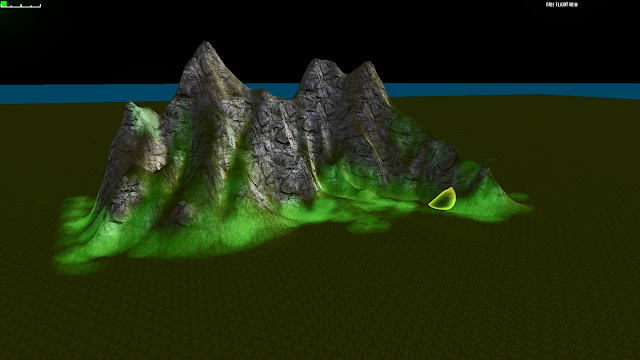
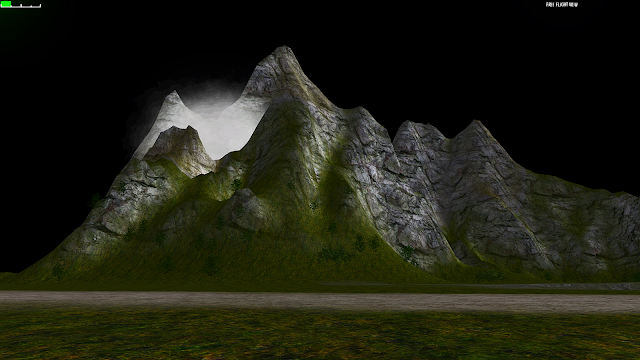
Now depending on how good you want this to look, you can probably stop there if you really just want some background mountains for a game. But if you're trying to create a photorealistic shot, you're going to want to adjust every component. Let's start by changing from the 'lush' terrain to 'Lush HD' and putting all the graphical settings in GG to 'highest'.
 |
| Hard to believe this was a bland old mound 30 mins ago, eh? |
Understanding what you're working with for mountains is very important; if you're just winging it, you're going to look amateurish. And we wouldn't want that, would we? So take a look at some reference material, research growth patterns in geology, whatever. In this case, I'll save you some trouble on a rudimentary thing like vegetation. Vegetation rarely grows on the tops of mountains. It's typically moderate or dense at the bottom and then becomes more sparse as it goes up.
 |
| Just a start, but the basic concept is there. |
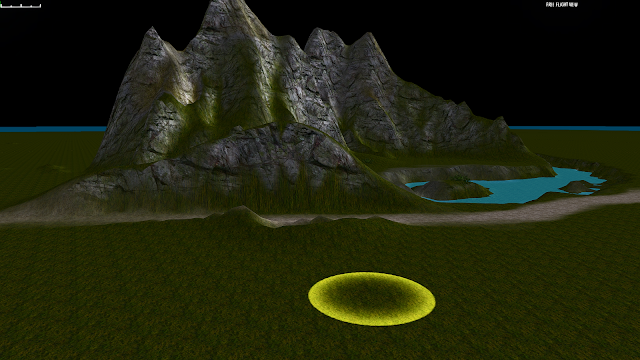
With Game Guru, I prefer vegetation quantity on 100%. The width and height for this were set at 50% (default values). I initially started with swapping the sky to my 'moonlit ocean' sky. Vegetation matching as a result required a darker, less obtrusive color. This one I think is called 'thistle'.
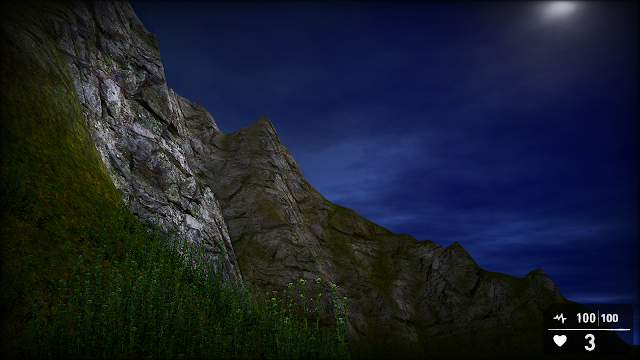 |
| Lookin' good for something not even done yet! |
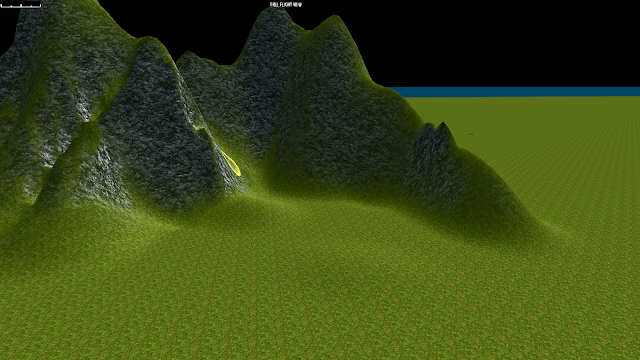
While that's nice, I realized I wanted to give the other terrain features as well including the half-rounded hill, inlet with island, and simple path. It's important to lay down secondary vegetation as well. For this I used foliage bushes 1 and 2. For bush 1 (the smaller of the two) I used the spray tool (the "I") key. For the larger bushes (bush 2) I hand positioned them and rotated them periodically to give them a more natural look.
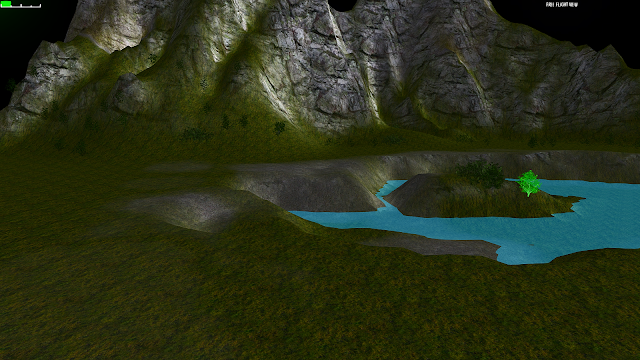 |
| Adding some minor vegetation to the island and inlet. |
One of the tricks I use to make inlets is to reduce the terrain to a depth I like (moderately shallow, player-depth water) then use the Level mode tool to 'cut out' the terrain I want. I usually move the mouse around rather slow for specific areas and moderately fast for areas to give a slight elevation to (such as that slight beach in front of the island).
Continue tuning until you get the desired result.
 |
| Creeping foliage up the side, a good waterfront, reasonable mountains... success! |
Around this time you can add decals for fog (free ones on the forums,
HERE or
HERE which will provide you reasonably decent fog that you can tune to either give a misty mountain appearance or perhaps that of a volcano.
 |
| Placement of these is trial and error but not terribly difficult. |
|
|
That said, I wanted to get close to the original, if possible. so I added a few more pieces including a rounded hill that had a sharp cutoff through it to give a similar appearance to what is in the original picture. I used the level tool to cut through the mound to give it that sharp rock face.
 |
| The leveling tool is one of my favorite additions to the toolkit. |
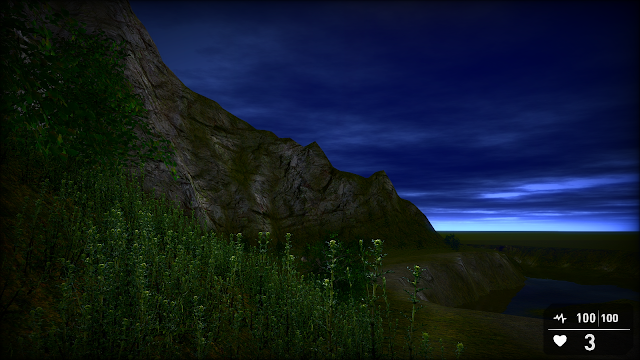
Now it's time to set the sky and colors. It takes a little twiddling but you'll notice that when I switched the sky up I had serious issues with the existing foliage being too dark; here again I had to go modify it to suit the scene, as you will often do.
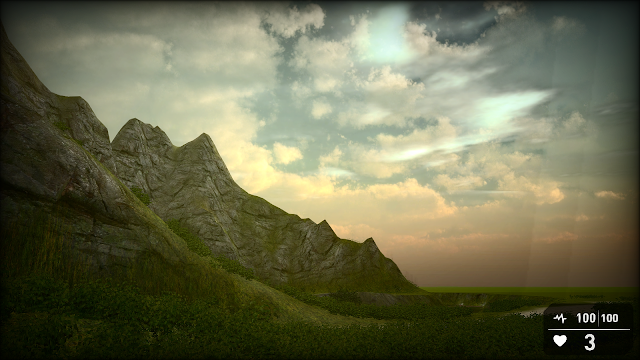 |
| Thistle is real good, but pretty dark, overall. |
You can find yourself in a number of possibilities the terrain system. It's very flexible and fluid if you're willing to invest the time into trying to learn new things.
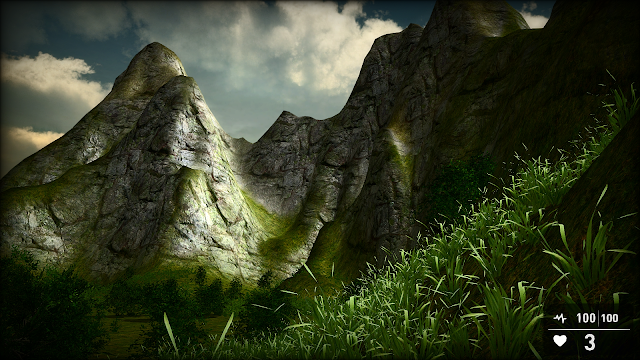 |
| Probably my favorite pic of the lot. |
One trick is to take rocks from the scenery that comes with Game Guru and add them to the mountain.
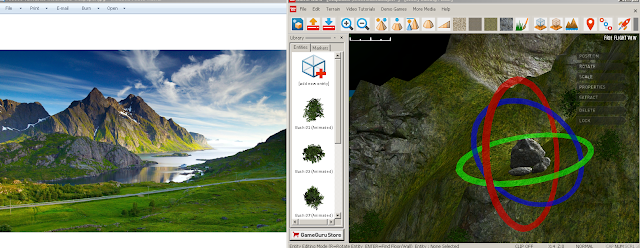 |
| You can get a sense of my workflow here with the reference photo on the left and the editor on the right. |
In the above picture I'm positioning one of several rocks which are masked by the vegetation system.
The final result came out pretty good. Of course there's always more work that could be done but overall I'm pleased with the results. Hopefully you'll be pleased with your results too. Feel free to post some images of your own to imgur.com and link them in the comments.


No comments:
Post a Comment