Search This Blog

Showing posts with label Game Guru. Show all posts

Monday, March 4, 2019

This Week in GameGuru - 03/04/2019

This week's update will be exceptionally short.  I simply can't invest the time with this being crunch week.  My book is going to the publisher on Weds/Thurs.

Official GameGuru News


** Unofficially I have it on good authority the changes to the mega pack 3 are about a month or so out.

Officially - while I haven't seen anything direct I can honestly say it looks like we're going to receive a very large update in the next few weeks.  Time will tell. Code merges on github look promising though.


What's Good in the Store


This week has several great objects by Mad Lobster for a photo booth


 M Stockton's cookout collection is a great price for some awesome assets


Lotgd really awesome low poly cockroach with very good movement patterns.


So all in all, a pretty good set of objects to pick up!


Free Stuff


Lafette did some beautiful beer bottles https://forum.game-guru.com/thread/220474?page=1#msg2612553

Lafette is giving away three animated workers https://forum.game-guru.com/thread/220474?page=1#msg2612691

Third Party Tools and Tutorials


Several good tutorials by Wolf:
Creating many corpses / dead bodies for your horror game in little time without modeling knowledge 
Getting models with multiple textures into reloaded
Necessary Edits to get EAI's weaponry into GG 

Along with one from PirateMyke:
Graphix Explosion Particle Instructions  


Random Acts of Creativity (WIPs)

Bonesy made a pretty excellent supercut of his work in progress (Cyberfi)


HellreaperX's "Death House of Barker Creek" showed a tantalizing pic of a new monster:

This post  by cybernessence: https://forum.game-guru.com/thread/213870?page=5#msg2612636 is a must read if you're a hardcore user.  Wow, just wow man.


In My Own Works

Welp, we're here. 140,000 words, 23 chapters, an appendix with a full Lua, FPE, gunspec, error code and other references.  130+ high res grayscale pictures.  11 months of work, probably about 800 hours of time spent... and it's almost ready to go the publisher.  It leaves the train this week.  Barring any unforeseen circumstances we're talking about a 4-6 month time before it becomes paper in print. I'll be doing giveaways and coupon codes as we approach.

Beyond that I want to throw a big thank you to everyone that's helped.  If you want your name in the acknowledgements section, shoot me a message on my blog (gamegurureport.blogspot.com) or via discord.  Many of you likely already are listed. 

On a side note, I've been working on a whole new set of space skies with some new tools.  4k texture resolution and they're absolutely gorgeous.  Give those a few weeks for fine tuning.


Monday, May 21, 2018

This Week in Game-Guru - 05/21/2018

Official Game-Guru News:

So there's a lot of traffic at this point on Game-Guru.  Lots of bugs being squashed.  Looks like lighting is getting looked at, specifically an SDK called 'enlighten' as a possible solution.  In the meantime there's a host of new functions on the github iteration of Game-Guru that are lighting related.  Looks like I might need to go make an Advanced lighting kit :)  ...


Also in official news there apparently progress being made on an underwater state for the player, which should really open up the gates as to how water is handled.  Lastly it appears that mega pack 3 has gotten more PBR assets - the roofs really pop with the shine they have now!


Check it out here:
https://www.thegamecreators.com/post/gameguru-mega-pack-3-dlc-update-2

New Products On The Store: 


So a few new things available.  I'm really digging these complex and ornately textured lamps by Mad Lobster.  Reliquia has made some absolutely amazing skies which you should absolutely take a look at.  I've noticed that the quality on campana production's models has gone up, check out this cow skull!  And lastly Shadow Man appears to continue to be on his building-making rampage.


Free Stuff:

Good lord, there's a crateload.
https://forum.game-guru.com/thread/219680 - A must have ... Reliquia has put 16 free zombies up!

https://forum.game-guru.com/thread/219692 - Lafette II has put up two zombie kids and some desert props.  Be aware that having shootable children may violate local laws (Notably in Germany).  Caveat Emptor.
https://forum.game-guru.com/thread/219523 - Here's a good AI script for the soldier, a wandering type script. 

So from here, I'm going to stop and just sort of separate things so you can really get a sense of how important these next two are.

https://forum.game-guru.com/thread/215012?page=16#msg2600572 - This has been a Long, LONG time comingAmenmoses and Bod have teamed up to make a really awesome vehicle script for a truck - this looks and feels awesome. 


https://forum.game-guru.com/thread/219628 - Honkeyboy has added his own flavor to the drivable vehicle scene with this racing bike script!

Those two should keep you busy for a while.  Amazing stuff, truly.  Looks like I owe someone a prize from my bounty board!
 

Third Party Tools:

I'm working on the notepad++ update.  It's a lot of work because they keep making updates over at github!  But it's coming along.  There's a LOT of XML to pour through and verify/cross check.


Random Acts of Creativity:

https://forum.game-guru.com/thread/219296?page=1#msg2600665  - DK's latest update in his wasteland saga.  Looks good though personally I gave him the following input on discord:
"So observations @Duchenkuke for your test #3 - 1) I don't like the new coloring. There's not enough contrast. It looks too black, white, grey, and drab. Sorry! 2) The inventory looks easy to use but I'd really work on cleaning up the interface elements. Maybe use a color other than white (maybe a white-orange?), some asymmetrically sized boxes, etc. 3) The vehicle was awesome. What kidney do I have to give you so I can build a truck driving game for my son? Overall though your level design looks fantastic. Your use of clutter is second to none and honestly aside from the coloration issues I'd say you're coming along really well."


In my own works:


I'm continuing to procure more items and art for the book's sidecar modules.
It's a lot of headache but at the same time there's a big payoff for those who will purchase by getting a combination of high quality free, store, and exclusive assets.

Monday, December 18, 2017

This week in Game-Guru 12/18/2017

Notice: Next week's issue will be delayed a day or so due to the holidays.

ENGINE UPDATE PROGRESS REPORT


No new updates for us normies.  We're still in beta-test limbo; apparently a beta update was released to the closed beta testers which was labelled as a public preview update.  This accidental update might cause you some confusion if you find yours hasn't updated.  That said given Lee's recent flurry of responses on the forums we can see that there's definitely some renewed emphasis on bugfixes and system stability (specifically with memory).

Also worth mentioning is my own find that you can reduce CPU usage by a drastic amount on most maps by updating the AI scripts to include some changes.  Specifically it appears that 'always active=off' does not actually appear to be functioning.  So you need to manually configure this via a player distance check in the script.  By doing this, you kill the overhead required for the rather intensive AI system.  Details can be found here: https://forum.game-guru.com/thread/219078

For now though, we're all waiting for what looks like what will be a new-years update to improve stability and performance.   I'm really hoping Lee grinds this one out over holiday though I can understand if we have to wait until February for it.

NEW PRODUCTS IN THE STORE

 
Some small, but interesting updates.


This week on the store we have a new artist (Thorus) making a solid go of some residential models and a decently good looking tractor.  These models are well priced, most going in the sub-one dollar range per model.   Moshroom has written a new script which degrades weapon quality and makes them unusable after a point.  Acid has added a ... moving target?  I couldn't really discern this one's purpose but I'm sure someone will find it useful.  Lastly mstockton, who does a solid job on his modelling, added a nice padlock and key set for a very good price on the store.
 
Lastly added to the store was an actual game:

This particular game, Savior V1, has been around a while.  It however, represents a certain threshold for quality that most 'steam game releases' I've seen fail to measure up to.  While it's well priced at .99 cents (on sale at this time for a meager .50 cents), it is worth playing from the standpoint of seeing quality game design and development in Game-Guru.  One can learn a significant amount from osmosis and this situation is no different.

That aside though what's really important about this is it highlights the store as an additional distribution channel.  While we could potentially suffer the same problems as other channels (such as the hot, shoveled garbage games that find their way to steam) it could prove a really interesting way to market your own products to a smaller, more receptive audience.  Definitely worth considering fotr the future.

FREE STUFF

 This week's update in 'Free Stuff' has brought some absolutely incredible scripts.  I mean three really big hitters that all solve a lot of major issues for Game-Guru game devs.  First up is Solar's objective script found here: https://forum.game-guru.com/thread/219081


Check out the above picture.  You can see clearly marked objectives which float under the object; this is going to be massively useful for the average FPS game.  The best part is this one is actually very straightforward to use and adapt so it will bring a lot of value to a lot of people.
 
Next up is AmenMoses, who has once again provided a crazy amount of utility those of us who want to really push the envelope in Game-Guru.  He's created a utility library that allows object rotation, connecting decals to objects, and much more.  It has to be seen to be believed, check out the videos and the downloads here at the forum link:  https://forum.game-guru.com/thread/219096

HonkeyBoy has been working tirelessly in Game-Guru on several projects for a few years now.  These projects are pushing forward and his toolkit has really grown a lot over the past few months.  Recently he's added a survival and crafting script for people to use and abuse:


The script, along with some secondary scripts (fire making, shelter making, etc) can be found here: https://forum.game-guru.com/thread/219061
It's also worth mentioning he's added some new models for download that are free for use as well here:  https://forum.game-guru.com/thread/219082

Graphix has added a few impressive glass panels to the forum which I will personally be using extensively.


My previous 'glass panels' were some really old ones I'd hackneyed together from some pretty old assets.  While they worked ok, they didn't do a spectacular job and looked cheap.  These look exceptionally high quality and use alpha channels well.  Get them here: https://forum.game-guru.com/thread/217932?page=6#msg2592415


 THIRD PARTY TOOLS

BOTR has updated the Heightmapping to MDAT tool again with a new GUI and a fix for the Windows 10 machines that were crashing.  It's really coming into it's own.  This brings it up to a current version of 2.1a; it can be found at this location:  https://forum.game-guru.com/thread/218876?page=3#msg2592417

I personally have used the older versions to some good effect though it takes some tinkering to find the right settings for the scaling and what not.  Overall though this is a must-have item for your toolbox if you plan on using any kind of pre-made terrain or imports from terrain building software.


RANDOM ACTS OF CREATIVITY


This week I play-tested Bugsy's Multiplayer Simulator which was fun and interesting.  It ran well, played well, and reminded me a good bit of Quake 3 Arena.  I'd love to see him push this project further and as always it's got some of Bugsy's hallmark humor added in as a dry touch:

More games need a 'middle finger' model, IMO.
Also after long last we have an update on Wolf's epic flagship game - Shavra.   If you aren't familiar, Wolf is one of the top tier developers for Game-Guru.   He's in a very small group of other talented developers and this is his baby.  The screenshots alone from 4 years ago show the Game-Guru engine stretched to it's limits.  The latest screenshots are jaw-droppingly gorgeous, as you'd expect:


There simply aren't enough Game-Guru games meeting this level of quality.  I find it really impressive and have to say I wish I could meet this level on my own work.  It looks like it should be out of Unreal or Unity.  Not something as 'plebeian' as Game-Guru.


That wraps it up for this week.   As mentioned next week will have a delay before I post any new content, I may even skip it entirely.

Keep an eye out for some interesting new work from me too, I've been hard at work developing some new tools for Game-Guru users as well as a secret project that only a few select people know about.  It'll take a good 6 months before it's ready, minimum, but once it's released it should really open a few eyes.  That's about the most I can safely say on it.  That and that it's about 8-10% complete as of this moment.  So I have a long road ahead of me.  Thanks again and see you next week!


Monday, November 20, 2017

Latest tidbits

So lately I've been exceptionally busy preparing for my house to be sold.
That said I've found time to complete my lightkit, place it on the store and begin selling it.
I also made a tutorial video.


Warning: I'm a terrible video editor.

The item on the store is located here:  https://www.tgcstore.net/product/30936

Also I've gone through the trouble of collating important information on Game-Guru (as I've found it) into a reference list.  I used to keep this as a sort of 'private page' but now I'm opening it up to everyone else.  It can be found on the sidebar but here's a direct link in case you can't find it:
http://gamegurureport.blogspot.com/p/reference-list-for-gameguru.html

I've also added 'sparckman.com' as a site in my sidebar list as well.  He's been around a while and has some good scripts as well as tutorial videos on youtube.  Definitely check him out!

Beyond that there's some interesting stuff coming but we are all waiting with baited breath for the latest GG update.

Monday, September 12, 2016

Technique Training: Fog and Environmentals

I was originally going to bake this in with my Advanced lighting series but this is more of a subject unto itself.  One of the more powerful elements within Game-Guru for creating environmental effects is the fog system.  The fog system was originally... laughable:


Picture courtesy of  Lee Bamber's now extinct dev log.
As you can see it was just as simple coloring of everything in the background.  By comparison, this is the fog system from the way past dead Game Creation System from the mid-late nineties:

Literally the same system in practice.

That said, at some point, Lee realized this was a titanic error and fixed it to provide a significantly better fog system.  We ended up with something vastly better:

This is an old picture, but shows the lower limits of what's possible.
So as you can see this has a major impact on the function of environmentals.  This game engine has very few 'modern' features.  It's important to stretch everything to it's limit so that's what I'm aiming to teach you to do!


Realistic nighttime!

So with that we approach our first technique; realistic nighttime.  In game-guru, nighttime effects are actually quite difficult to achieve.  This is primarily because the sky system has a constantly active light which will frequently circumvent your efforts.  This light is fixed in space and you can turn down ambient/shadow values to zero but your game will still fall short of achieving that desired 'nighttime' look.

The trick, the real trick, is to use fog.  If you set all the values to 1 for RGB, set the range start up close and the far distance close, then modify the intensity as desired it will create a black fog which accurately mimics the feel of night and it's creeping darkness.
As you can see from this picture:  it looks silly with a daytime sky.


But if you add a nighttime sky, it all falls together.  The best part is it accurately sets up flash-light fall-off.

As you can see, it looks far more like night.

Distance simulation with Fog

One common mistake I see in Game-Guru games is that they very frequently don't factor in standard atmospheric effects.   This in turn, makes their own job HARDER.

Not a bad city depiction, texture misalignment aside.


So this scene looks good.  It's a basic city done with some simple city models someone made.  Overall, not terrible.
Compare this against GTA IV:
Can you guess the difference?
The difference is atmospheric haze.  A slight atmospheric haze provides a level of reality to any city scene as most any place in the world has at least SOME slight atmospheric haze.

Haze is defined as: "Traditionally an atmospheric phenomenon where dust, smoke and other dry particles obscure the clarity of the sky."

What you'll find is in almost every scene, from top to bottom at least a slight tinge of fog on the outlying distance (use your total visible range in an average scene, add fog to the last 15-20%) will have atmospheric haze.

Don't overdo it, or you'll look like silent hill.
Trivia fact: did you know the first Silent Hill's trademark fog was actually a way to disguise the draw-distance limitations of the PlayStation 1 and the respective game engine involved?  By implementing a heavy fog they accomplished both an incredible atmosphere and also improved game performance.  That's win-win!

When implementing your haze, you want to keep in mind that time of day matters; remember haze is effectively a reflection or light being blocked.  As the time of day changes, so too does the haze.

Not a game-guru picture.  Just some random image from google.
As you can see above, the relatively nearby trees have a SLIGHT orange tinge (even in the upper branches) caused by atmospheric haze and ambient lighting.  The lightrays further illustrate the haze, though lightrays on Game-Guru are totally dictated by the aforementioned fixed sun.
This is more what you're striving for:

From Twin Worlds - Note the orange haze, matching the sky perfectly.
As you can see, these settings are pretty simple stuff. You can do quite a lot with them.


Further examples(settings included):

My city test - day, with Atmospheric (normal) coloring:
If you further modify your depth of field settings you can achieve a more pleasing result, but this fairly decent for a quick example.

 
Preparing for a more night-oriented effect.

This is a longer range darkness, but still dark.  I left the cloudy sky in for contrast.

Now is a really dark version - high intensity.  Distance remains the same.
 

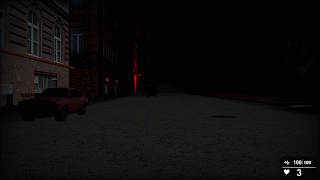
Notice how the red light is no longer visible.
Maximum darkness.  Close range.  No flashlight.  Dark sky.  

I had to move close just so you could see anything!!
Sunset Sky, Sunset fog for atmospheric haze.


My favorite, personally speaking.

 Silent hill, just because :P


Just add pyramid head.


As always, feel free to comment.  If this has been useful to me, please post a link to your results below!

Tuesday, August 23, 2016

A few of Erart's more 'unusual' pieces.

So this is the review I was talking about.  The one where I have some things to say that may be considered somewhat negative.  Overall, I have good praise for Erart but a word of warning I do have some buyer's remorse over one object - specifically the coconut throwing weapon.

I'm usually very careful about what I purchase; I want to make sure I only buy the things I plan on actually using or I can use to some functional end.  This means a great many purchases I make are actually based around my Sci-Fi WIP. 

That said occasionally I purchase models for my son to use or objects I just plain find interesting.  I recently made a octonauts themed series of items for my son (nothing special, just some alpha masked 2-D decals he could place, along with a poorly made 3D model of the octopod).  I decided to splurge and purchase two items from Erart:

First was 'coral reef 2'.  This is the lower priced of the two coral reefs he offers.  It's a simple coral reef with some anemone and a starfish.  That said, it's really impressive what he's done - he managed to make a very functional dynamically moving object that adds a lot of life to your underwater scenes.

As you can see from this video, it's got a lot of really cool behavior to it.

In game, it looks like this:
Nevermind the coconut, that's for later. 

Now the reef itself is rather small but blends in well with grey or brown surroundings.  I for one was extremely happy with this piece.  It has a surprising amount going on and I'd reckon it's pretty much required if you want to run an underwater level of any kind.

The next piece was the 'underwater skybox'.  I've made a number of skies myself so it's not often I purchase other people's skies.  This was however a very unique offering giving an 'undersea' view of the surface water above and some jellyfish flying by.


Well.. Overall this is an excellent skybox. That said there are *SOME* complaints.   Nothing major here.  Primarily that the jellyfish appear very flat, are too frequent, and move way - way - WAY too fast.  I mean unless those Jellyfish are mounting jet engines, there's no way they should be moving so quickly.  It can be tuned, of course, manually via the skybox settings files but the end user shouldn't have to do that.  So buyer beware - it's a good skybox but you may find yourself tinkering with it.


So having purchased two separate items and being reasonably satisfied by his work - I decided to go for it and purchase what I felt was a 'must have' silly item - the coconut weapon.


So as you can see from the video, the weapon seems reasonable enough.  I want it specifically as a 'cheat code' silly weapon that will basically destroy anyone it hits.  That's easy enough for me to implement, of course.  The fact it's a coconut is perfectly ridiculous for me.  I feel that this has limited utility outside of a strictly 'survivalist' game, which there's really not a lot available in that respect weapon-wise so you may find yourself never quite in the situation I was in.

So let's start with the nitty gritty - first off, the modelling, method, and texturing is really well done.  What was done here was ambitious and I look forward to future weapons by Erart.

Behold the coconut, mighty in it's glorious power.
So the coconut is a hitscan weapon.  It's modeled very well.  The hands are a little... cartoonish but nothing game-ending for me.  What kills me though is actually the OFFHAND.  First of all - it serves NO function; it's just there. And second of all, it makes your character seem like they have Bell's Palsy or something.  You literally run around with your hand sticking out stuck in a sort of rigor.  Then when you toss the coconut, the hand comes up and comes down as if it's attached to a stick.  It's ... unfortunate.  I really can't find myself wanting to use this weapon simply because I can't stand the offhand.  I'd rather he just get rid of it altogether, if possible.  I may write him and ask this, I don't know. 

Take a look:

This is the start of the throw. 
As you can see above, the initial part of the throw seems ok - though that second hand really never touches the coconut at all.  And the main hand is ... awkwardly angled but that's less of an issue than it might seem.

The problem is the left hand remains locked in that posture and simply ... goes down.  It looks absurd.

Apparently you have really bad arthritis from years of coconut throwing.
So .. yeah.  That's the meat of it.  If the hand movement was less rigid, it'd be a top shelf gimmick item.

As it is, it's relegated to my 'maybe one day' bin.  Overall, I applaud Erart's absolutely unique offerings.  Almost everything he sells has some unique edge to it that can't be found by any other vendor.  I'm shocked at some of the genuinely impressive things he's done.  If he can just improve his model animations a smidgen he'll easily best some of the Game-Guru community's top authors.

Monday, August 22, 2016

Semi-regular (ok not really) update

So I've been busy with a number of projects recently.
But unfortunately real life has sucked up a ton of my time.  That said there's some news here.

First dealt with a Cygwin issue.  I use Cygwin at work with the metacity gnome desktop for x-windows.  I do this so I don't have to run a virtual machine and can interface as cleanly as possible with my required windows apps while having minimal overhead. 

So this week we had an issue where a recent update nuked my cygwin instance.  After much gnashing of teeth I had the Trendmicro admin add my c:\cygwin64 and cygwin64\bin folders to the exclusions list.  I then reinstalled cygwin.  I then ran into several weird issues.  The primary one was needing to reinstall pulse audio due to an error with the device not functioning and the dll not being found (found via .xsession-errors file).  The second was I wasn't using the right repo (local repos don't completely archive all possible components).  The third was a complete piece by piece reinstall of gnome.  That seemed to do the trick.

Next up I contacted Lee @ The Game Creators (makers of Game-Guru) about lighting.  I learned some interesting things which greatly impact how the lighting will be used going forward.  I plan on doing a detailed fourth part to my lighting tutorial based on what I've found.  I also played around with reshade to maximize FPS and produce the best graphics possible from Game-Guru (at this time).  The results were nothing short of shocking.  That will also go into that fourth update.

I learned some new tricks with game-guru in respect to level design and also renewed my interest in my sci-fi work in progress (as yet unnamed).  More resources were gathered.  I plan on revamping some textures and then reintroducing them as HD components.

I've also got my first review where I'm genuinely disappointed in what I've purchased.  It's unfortunate because I had such high hopes for it.  I promise not to beat on them too hard, I just have a case of buyers remorse :)

All in all things are moving along albeit slowly.  Stay tuned!

Friday, July 8, 2016

Review: Oldpman's Carnival/Amusement Set

So it might seem a little unfair to some, but I'm going to be reviewing another of Oldpman's products.  He produces a lot on a consistent basis and much of it isn't stuff that's really up my alley but is of frequently very good quality.

I noticed he hit an abandoned amusement park pack and before it was even complete as a kit, I already hit buy.  I was pleased to notice between the time of that purchase and now I've been gifted with a few extras.  So there's a lot here to review on what is a very well priced kit.


Now I'll admit as I've said in the past vending machines, arcade machines, and amusement parks all capture my fancy.  I personally live near a major east coast USA park (Hershey Park) and spent much of my youth there so I have many fond memories.  There's also a few abandoned ones in the area.

Almost immediately the pictures he had up reminded me of another park.  Specifically the infamous Pripyat park, in Chernobyl.

Looking at some pictures and comparing against what he'd posted, it was a pretty close match.

I see similar looking yellow bumper cars.  I see the strange Soviet-esque architecture.

I see the copper floor model.  Yep, looks right. Definitely Pripyat.


One thing bothered me though - In many of the pictures, I saw a red cart as well.  And this kit didn't come with a red cart.  Well, nothing copy, paste, recolor (hooray for paint.net) of the DDS file couldn't fix.


Behold, my addition to the kit.  I'll send it over to Oldpman and ask him to add it in.


Variety is the spice of life, after all, even in former Soviet Russia.

So on to the kit itself.  It contains a wide variety of objects.  There's walls, wall corners, a coconut shy, a full set of bumper car items, a ferris wheel, a round-a-bout carousel, two hanging chair carousels (one is animated), some flower planters, benches, etc.  
Overall, it's a hell of a value for $4.50; initially when I purchased this it had about 6 items and I was playing around with trying to get regular objects to fit with them well.  So it's refreshing to see him add walls and what not to help round out the kit.  Let's see what we can do with it.


As you can see I've begun assembling your regular run of the mill amusement park.  I decided to try to use as many free assets or stock assets as possible to help setup this park in a meaningful way.  I did however use the 'Wizard of Id' Sci-Fi Wall kit, but only for an entryway because the stock entryway is a bit simple.

This is just a little bland for my tastes.

That's more like it; parks should be grandiose on entry!
So basically I found the park actually worked exceptionally well with stock assets.  Here's a list of some of the preferred ones that I used:
  • Blue/Brown Port-a-potties
  • Barbed wire chain link fence
  • Tent (canvas) - used for creating a custom amusement, a shooting gallery: 
  • Standard wooden boxes with wooden crate palette as an improvised countertop
  • Dumpsters
  • Structure (Building A and B)
  • Some free tree-lines from Belidos
  • Some free picnic tables I snagged a while back from Valuable Assets
  • Other basic assets I am failing to remember.  Nothing major though.   Just your usual signs, boxes, crates, etc.  
So let's fix that entrance and really give it the proper treatment for a busted down amusement park.


There we go.  Notice the simple signage, mountain being added as a backdrop, broken chain link fence, etc.
Continuing on, obviously it needs detail work.  I want to see how this is going to look in a near finished state.  Here's the 'final' version:


At this point that treeline encircles the entire 'zone' and the mountain is very detailed now, lots of ridges, chimneys, chutes, etc.  Unfortunately when I went into the game the graphic settings were clearly too low.  So I put on an overcast sky, added fog, tweaked lighting as I've done a hundred times before... Added my 1024px High Quality Road Set and some dried vegetation. 

Here's some snaps in no particular order:


It's surprising how just a little lighting change, the right elements, and configuration can really bring a scene together, eh?


The Bottom Line:  If you're in the market for a really superb kit which matches a lot of the stock pieces, has great mood and represents a good value for the price  - then this is definitely a buy.  I will say it's pretty contingent upon your 'need' for a kit like this.  For my upcoming game there's an abandoned entertainment zone so this suits very well.   Oldpman's work continues to impress.

Updates to the set have been done in response to this article, read the update HERE!

Thursday, July 7, 2016

Technique Evaluation: Advanced lighting techniques (lighting part three)

Welcome to 'lighting part three', a tutorial on advanced lighting techniques in Game-Guru. I warn you, this subject matter is heady and can be difficult to really grasp.  It is, however, vital, if you wish to get the best quality in terms of lighting and performance from your Game-Guru engine.

If you've not see the other two tutorials, please do them in order first:
Part 1 - Lighting
Part 2 - Interior lighting

As you will NEED the understanding from those two to get the relevant pieces from this lesson.

So right out of the box let me say that on it's own, the lighting situation in Game-Guru is ABYSMAL.  I mean it's really painfully dreadful in how archaic and primitive it is.  That said, I am a firm believer that you can take even simple tools and craft fine products.  So I've done a lot of the hard work for you to work out the details of what's involved with getting your lighting looking as clean and slick as possible.

I've modified our room from the previous lesson from this:
 Remember this?

To this:


So it's a little dark but you can see I've replaced the chairs with the plasma tubes from the new Sci-Fi DLC.  I've added *ONE* green static light to provide some illumination but these are getting almost all of their color from the illumination map they ship with.

On mapping


What's an illumination map?  Some of the more high quality items on the store or available as DLCs from "The Game Creators, Inc." include what's called a illumination map as well as the standard normal map (Normals create bump-mapping which is introduced via specularity).
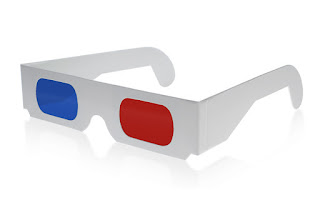
This is how your computer sees a normal mapped texture.
What?  Huh? Spec-u-whatity?  I assumed a level of knowledge you don't have, sorry about that.  Ok so you *PROBABLY* know how textures and mapping work but if you don't the basic concept is similar to wrapping a gift for christmas.  If a plain colored brown box is your model, then texture mapping is the actual gift-wrap.  Think of Normal-mapping as a sort of color coding which introduces a false sense of depth to a two dimensional piece of wrapping paper by putting it in that awful red/blue color with 3d goggles that were such a rage in the 80's.


This is a normal map for a tinfoil texture.
The lighter blue areas create a 'shiny' spot for the rendering engine.  The darker red/blue areas affect the lighting in such a way that it will artificially shadow and shade a two dimensional texture and make it look THREE dimensional even though it's not.  So you end up with some really photo-realistic results.  This is actually a pretty regular way for games to handle three-dimensional rendering these days.  In terms of our gift wrapping example, it's a gift wrapped in three-dimensional holographic paper which looks really awesome with those silly paper glasses on.



A very simple window reflection mask, aka Illumination map.
So going back to it, what's an Illumination map?   Now that you know how a texture map and normal map work; what the hell is an illumination map?  Ok - this takes the whole concept of texture mapping and adds another layer (some applications add many, many more, but this is a very simple one that very many game engines use, including Game-Guru).  It's simply a high-low value which tells the game engine if a portion of the texture should be really bright at all times.  This gives it an appearance of being illuminated (imagine that).

In terms of our gift wrapping example, imagine using neon-light up paint on the three-dimensional wrapping paper.  That's what game-guru is doing here, in that dark room, to make those barrels look green and stand out no matter what.

An important thing to note is that without an illumination map, you are completely relying on the normal map to provide lighting; as such a lit object such as a window, skylight, lamp, etc will never look right without illumination mapping!

Got it? 

Still want to go on?

Good.  From here on, things get much more difficult.  The rewards at the end are worth it though.

There are TWO types of light sources in Game Guru (Hereforth referred to simply as "GG"):  Static and Dynamic types.  A static light source is used when light mapping, as discussed in tutorial #2.  A dynamic light source can be used to light dynamically - meaning it can be turned on/off/etc.

Dynamic light sources are the real weak point here.  While static mapping helps a LOT to alleviate this, they are simply echoes of what you really want to see.  So there are a few principles about dynamic lighting you need to understand.  First is that a dynamic light will shine through walls.  So it will go through a room and into the next one, lighting up those objects.   Further, the engine as of current can only render *2* dynamic lights at any given time in view.  So make sure you plan accordingly; try to make sure if you're using dynamic lights that you do not ever use them in large quantities in an area.  Use them sparingly as spot lighting, to draw attention to an area or illuminate something important. 


What alien?

In the above picture I've got our four plasma tubes and a friendly Alien NPC in our room.  I'm using very low ambient and surface level lighting (10 each) and have four green static lights and one large white static light on the right.   Note the lack of illumination mapping on the ceiling tiles means those light bars don't stand out much.  Also notice there is no green reflection on the alien.  Just a few points of light coming from our sun source which unfortunately will always filter through walls.  Again, not a world ender - just plan around it.

 Oh, there he is!

So at this point what I've done is kept the same light levels but added a green dynamic light of moderate size slightly forward and between the array of objects.  This provides more room lighting overall as well as  a green tint to our alien, which provides a sense of realism.  It still looks.. off but at least is a little more respectable.


Here what I've done is decrease shadows slightly, increase bloom significantly, and increased surface lighting (which is how much light is shown from received sources).  It's definitely got that 'radioactive' feel I was going for now.

Color usage:
- http://planetpixelemporium.com/tutorialpages/light.html
https://forum.game-guru.com/thread/215134
- Saving colors in mspaint for gg use later

Static lighting secrets

First, a quick summary of our principles before we begin:
- Size matters
- Intensity via overlap and clustering
- Overlapping colors
- Mixing dynamic and static lights

Just a heads up - we're changing our example for the rest of this lesson - it will herein be a car parked in a garage (buildings pack, warehouse interiors, small blue warehouse) with a *ZERO AMBIENT LIGHTING setting and very low surface lighting value of 1!

This is a single 500 size static light.

Now let's get onto our first principle - Size matters.  This is relevant not because of the inherent phallic innuendo but because in the realm of static lighting, you are fighting with really weak influences on your environment.  The simplest way to improve that is to simply use a rule of thumb - a static light's size and influence is roughly 1/5th that of a dynamic light. So a size 500 dynamic light needs a size 2500 static light.  Even then it won't QUITE be the same, but it will help significantly cover areas and properly detail lights.  Here's our example with a 2500 size static light:


So in the above, if you go to full size on it, this picture shows very clearly a reasonably well lit car in a garage with traces of light spilling out the door onto the terrain below.  The problem, while it looks *OK* and would quite honestly be acceptable in most cases for a Game-Guru offering,  is that it won't illuminate *ENOUGH*.  So what I've done is this:


I've added a single dynamic light of 500 size.  So you can see here the light is moderately brighter; the walls light up more and you still have light spilling out.  But there's also trace light spilling out through the walls on the sides onto the ground.  If you setup your scene right, people will never notice.  That said, it is an error and it's up to you whether this is the optimum route to take.  Personally I would just use the size 2500 light and make an illumination map for the light piece up top.  I've also found that certain light colors simply don't show up much.  Whites and bright blues, for instance, are pretty bad at lighting scenes.  That said you can improve this by adding MORE STATIC LIGHTS.  Now in my experience this can be overkill; you can totally wash out a scene by using more than three overlapping static lights.  Here's three small (100 size) static lights overlapping right above the car.
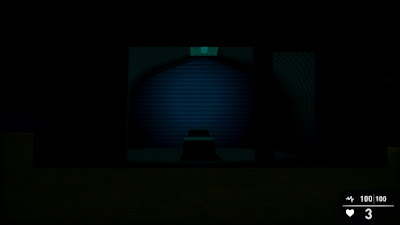

Note the intensity of the weak lighting, it's position, and how it impacts the scene.  It gives the appearance of a dim blue light being cast on the car. It also makes the car LOOK blue.  Red static lights are especially bad at this.


Here we're using several medium (200 size) cyan static lights.  It still washes out the scene but lights up the back wall now.  This, to me, just doesn't cut the mustard.  Compare all that work setting up those lights to just one LARGE (1500 size) cyan light.


Seems like an improvement to me, though it's still not where it should be. So we add a dynamic light!


So basically what we've got here is a large static cyan light (1500) and a dynamic white light (size 500).  This was done to show how to provide emitted lighting while still having cyan contrasting.
We still have the light filtering out the sides so I'd probably use cheap filler models (non-enterable buildings, for instance) on either side to hide the excess dynamic lighting.  Alternately you can make the dynamic light smaller.

SPECIAL BONUS SECTION

Special thanks to Wolf @ the Game-Guru forums for this!
 
Inside of your Game-Guru file, you'll find a 'Setup.ini' file.  It has several lightmapper related settings.  The higher the numbers, the longer it will take for the lightmapper to compile, but the better it will look on static surfaces.
The lower the number.. the more it will look like a travesty like this:
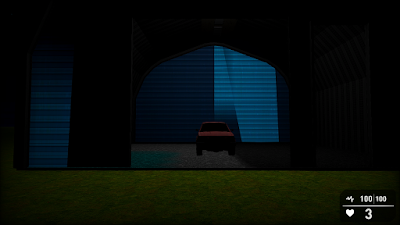

I think I used size 8 quality 8 here?

This is not something I can provide a one size fits all solution to.  I'm going to recommend you try adding up to increments of 128 each time or use 1024 as a starting block.  You'll need to close and reopen Game Guru each time to achieve lighting of sufficient quality.

Also if you recall earlier, I said *NOT* to use white lighting.  This is mostly true.  White lighting for some reason doesn't quite affect textures in a meaningful way.  It helps illuminate a scene, but doesn't really do more than just raise existing values.  So I use this chart:

http://planetpixelemporium.com/tutorialpages/light.html

Note the color values.  This tutorial I just linked above is a HUGE piece of properly lighting a scene.  You want to add to a scene, not detract.  Use your colors to really draw a person in and make them feel at home.  For examples, check out Wolf's Shavra: Renaissance game.  He's got a real good handle on usage of static lighting; he's even written his own tutorial HERE.  Be aware your static lighting is directly proportionate to surface levels in the Tab-Tab screen.  And my last little tidbit - when using static lighting, turn your shadows WAY, WAY down.  Those shadows will interfere with generated lightmapped shadows.  I typically have mine down around 10 or at most 20 for just the barest hint of shadow.

Thanks, let me know if this helped you at all!