NOTE: I POSTED AN ADDENDUM TO THIS TO BE READ AFTER THIS DOCUMENT AS OF 10/31 - Please read this once you've completed this tutorial: http://gamegurureport.blogspot.com/2016/10/lighting-guide-part-4.html
So when I say "seriously advanced" let me just preface that by saying that ... this is still Game-Guru. The lighting engine is still a decade or so behind where it should be. But we can still fake it well enough to be decent.
WARNING: THIS ARTICLE ASSUMES YOU HAVE READ THE PREVIOUS THREE.
So when I wrote my last lighting article I thought that'd be the last one. However, I recently had some correspondence with Lee Bamber (@leebamber). He's the head programmer for the Game-Guru project. Imagine this guy:
 |
| No, seriously, imagine it. |
Anyways this correspondence basically stemmed around me asking him if there's any way to increase the brightness of the static lighting in game-guru.
The response was nothing less than astonishing. Lee told me outright that the brightness of the static lights is DIRECTLY tied to the bloom slider.
Think about that for a moment.
So basically the brighter you want your static lights, the higher that bloom slider needs to be. It's a minor, but incredibly important distinction.
Now let's show that in action. Here's a screenshot from Wolf's upcoming 'Acythian' cyberpunk game.
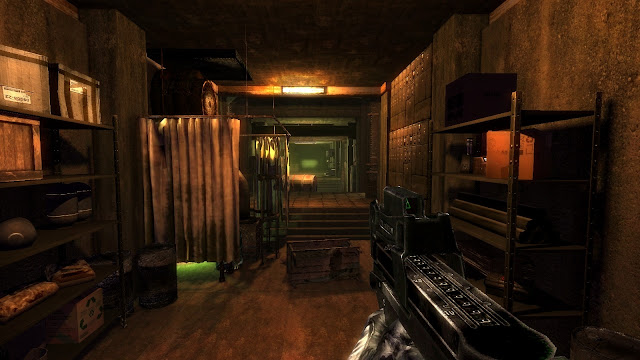 |
| There's at least 7 separate lightsources here. Can you find them all? |
Wolf's advice for this particular piece goes back to something I wrote about in part three of the lighting tutorial:
"You increase lightmappingquality to 1000 and lightmappingsizeentity as well (or higher) in the setup.ini. Now you place your lights either according to realism or colorscheme. I have written a lot on that in the past, lets just say here that basic leveldesign rules apply. (This is important because Gurus lightmapper is a bit wonky and so is the post processing which means that bad choices stick out way more than in something like the UE4.)"
If you've read the previous guides, then you know exactly what he means by this.
My own efforts have yielded improved results as well. Here's a little before and after:
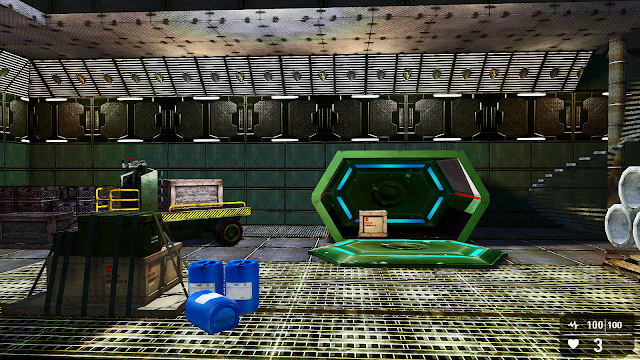 |
| Single light source, default settings. |
Well the after looks remarkably similar but the devil is in the details, notably the lines between the shadow and light are far better aliased. They're smoother; the light range is moderately better on the actual objects in question as well. Take a look - make sure you open it up in a new window to get a real close look because most of the improvement is very hard to see. Focus on the shadows on the boxes and in the green crate.
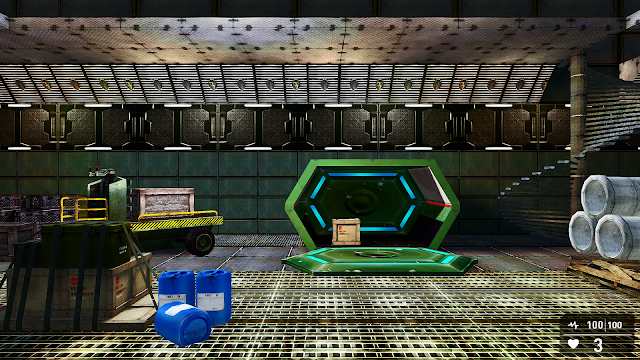 |
| With a single light source, using 1000 quality/1024entity settings in the setup.ini |
So if you're not aware, I am using a modification to gameguru called Reshade. Reshade was brought to us by NomadSoul, who ported it so we can use it. It's a AAA post processing system which can really improve the quality of your game's output and graphics. It can't add dynamic lighting or pre-processing stuff though so mostly you're just sharpening up the graphics or adding a filter.
I've messed with it ... significantly... for months. My first efforts with it were documented here: http://gamegurureport.blogspot.com/2016/01/just-little-update-nomadfx-reshade-mod.html
I have to say that this particular piece is pretty much a 'must have' for Game-Guru. If you want Game-Guru to look like your game came out in the past 10 years, you need this.
I believe if you want your game to sell, it needs to compete... at least a little. I can respect the efforts of anyone who puts significant time into their game. But if you aren't trying to tune it up so people will find it graphically pleasing - you will pay the price. Interest will wane or collapse. You will be derided privately and publicly. Adding post processing and tuning it is part of that process.
As you can see the jaggies are removed, edges are smoothed, bloom is cleaner, lighting is nicer and the tone map is significantly improved.
The cartoon setting allows older models to look more like they belong in a modern context. A lot of older freebie stuff had very simple textures which effectively sent it to background art.
Note the darker lines and more dramatic color ranges. It's a fast way to a borderlands-style look. One thing that WOULD need done is to make a mask for the HUD elements; it's within reshade's protocols so make sure you read the files that come with it.
As you can see there's a lot here that can be done to help create a unified theme for your game or bring it up to a more modern level. Gamers with lower power cards (this author uses a GTX960) will need to disable Reshade as it will cause a framerate dip. It assumes you have something capable of running it.
Picking appropriate lighting colors
Inside the GG engine, there's several different lights available. These choices result in some of the most atrocious color schemes possible. Unless you are specifically looking for a lime green or neon purple color to an area, you will need to modify these considerably by customizing the colors so they don't wash out your textures.
The best way to do this is to pick a standard color you like (Orange, Green, Blue, whatever) and move it towards the white range. White effectively is a 'clear' color for the renderer when using static lights. Let me say that again:
WHITE IS EFFECTIVELY A CLEAR COLOR FOR THE LIGHTMAPPER.
So if you use white lights you will sit around scratching your head wondering why the hell you're not getting any brightness. What you want to do instead is pick a color like yellow - and move it towards the white range - like this:
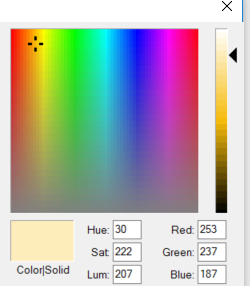 |
| This will provide a nice, orange glow. |
This tinting is applied as a layer which is then controlled in intensity by bloom. I honestly believe this should be a separate setting. Why it was tied to bloom I will never understand.
So using my existing scene, I've modified the settings from bloom at 35 up to 80, my usual trick of a light fog to unify colors and lowering the ambient down from 35 to 20. This is also with the enhanced 1000/1024 lightmapping setting in the setup.ini.
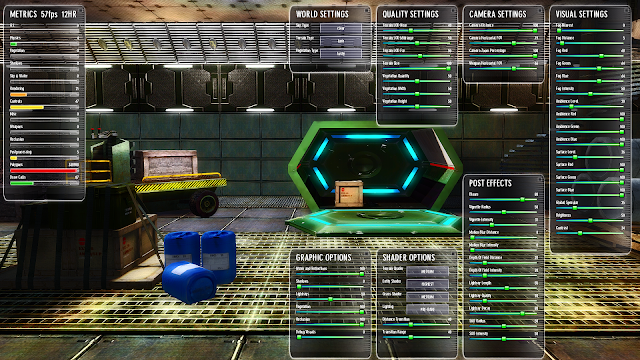 |
| I think this looks much better, don't you? |
As you can see the lightmapped objects look phenomenal for something out of a mediocre engine like Game-Guru. The illumination mapped objects (the Dagored scifi walls and Jackal's free sci-fi container) look awesome with some bloom, really giving them a feel of brightly lit objects. It's really important not to go overboard here otherwise you will wash out your scene very quickly. This is especially true with the ambient light levels; if they are set too high with a high bloom setting, you will get nothing more than a retinal migraine.
As usual, I hope these tips and tricks have helped you as they help me.
NOTE: I POSTED AN ADDENDUM TO THIS TO BE READ AFTER THIS DOCUMENT AS OF 10/31 - Please read this once you've completed this tutorial: http://gamegurureport.blogspot.com/2016/10/lighting-guide-part-4.html
If you have any additional comments, leave them below!


2 comments:
Hi Mike, i'm probably the first one who posted a comment.
Thank you so much for all the tutorials, this will be so helpfull to many people.
Now i understand why my light went through a wall and made some nice looking mountains during practising.
Thanks.
Thanks, I appreciate it. I don't get many comments here but I do have a large steady reader base. So people read, learn, and are generally quiet about it. I have some good discussions on the forums as well. But thanks for the input regardless :)
Post a Comment